Compost for Beginners
Garden Clippings for July 11, 2020
If there is a silver lining in this nasty Covid virus, it would be that we are spending more time in the backyard. The nation is growing more vegetables than ever before. We are painting fences, building patios, planting shade trees, splitting Hostas and pulling weeds. All healthy activities!
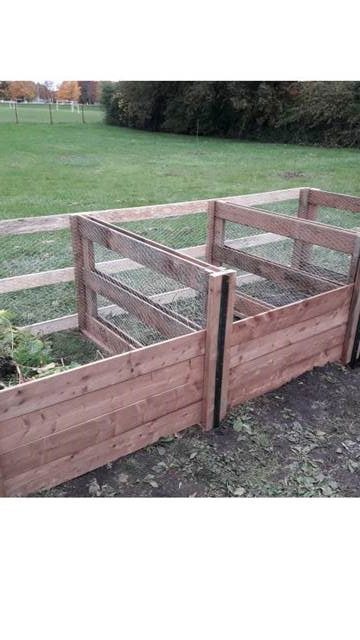
We will also generate a lot of green waste. At our previous home in the sticks, we would toss leaves, kitchen waste and weeds into the back forty, but now that we’ve move into town, we need a tidy compost bin. Plans are in the works (after the clothesline poles go up) to build a double compost unit, with one half for new compost and the other half for stewing.
The shortcut method of building a compost bin is to buy a ready-made plastic unit. A few decades ago, when composting was all the rage, we bought a plastic unit from the City and put it between the spruce in the south garden. It worked great but within a year or two the lower trap door disappeared, and the lid blew away.
This time around I will make it out of wood.
I will find a spot that is level, well drained with an open bottom over bare soil. I will get rid of the grass beneath and will set the sod aside to be chopped up and added to the composting material.
The trick with composting is to add a little bit of everything rather than a lot of anything. Leaves, straw, vegetable and fruit peelings, egg shells, tea bags, coffee grinds, grass clippings are all good ingredients for the composting process. Sawdust, cardboard, and wood chips can be added in small quantities.
The list of items you should not add to the compost bin are meat, bones, dairy products, treated wood and pet feces. Weeds are fine in the compost bin but beware of weeds that are finished flowering and may contain seeds.
Making good compost is like making lasagne. Start with a layer of small sticks or straw. Next add a layer of leaves, followed by a layer of finished compost or rich garden soil. Finally add a mix of plant cuttings, kitchen waste and grass clippings. Add water if the material is dry. Repeat adding layers until the unit is nearly full.
After about two weeks you will notice the pile has settled and has begun to break down. Turn the pile and turn the pile again in two weeks. If all goes well, the ingredients will generate its own heat. The more you turn the pile, the quicker you will make finished compost.
The speed in which you can turn raw material into finished compost depends on your ingredients, the temperature, moisture content and how often you turn your pile. You can expect new compost to be created in as little as a month or as long as a year. You will know the material is ready when the compost is dark, crumbly and smells like earth. If some of the finished compost has too many leaves or woodchips, toss it back in the bin for a second time around.
Use your compost in the vegetable or flower gardens to add rich nutrients. Mix it into the existing soil when planting trees and shrubs. Add a thin layer to the grass to level the lawn and repair weak areas. If you have too much compost give it to the neighbour who is starting a new veggie garden.